Microsoft Forms
Microsoft Forms is a versatile tool that can be used in various educational scenarios:
- Assessments: Create quizzes and tests to evaluate student understanding and track progress.
- Feedback Collection: Gather feedback from students and colleagues on courses, events, or teaching methods.
- Surveys and Polls: Conduct surveys to understand student needs, preferences, and opinions.
- Collaborative Projects: Share forms with other educators to create collaborative assessments or gather collective input.
- Administrative Tasks: Use forms for event registrations, collecting contact information, or other administrative purposes.
The Academic Toolbox helps you...
Typical Course Format?
Most tools in the Academic Toolbox can assist in both online and face-to-face courses. Many tools can provide benefits in either synchronous or asynchronous teaching. Some tools have been primarily designed for one format or another (synchronous/asynchronous), however, may be adapted for any format depending on your pedagogical goals.
To learn more about different teaching modalities, please consult our Online Teaching & Learning page, arrange a consultation with a CTSI Teaching Liason, or contact your Divisional support representative.
Where can I get more support?
Related resources / similar tools
How to Get Started
Microsoft 365 is available to University of Toronto faculty, students, and staff, offers a variety of tools and applications, many of which can be used to support teaching and learning goals.
If you are already logged in to you account, you can access Microsoft Forms via the App Launcher grid at the top of Outlook or other Microsoft pages or via https://forms.microsoft.com/.
Instructions
-
Create a New Form
-
- Go to https://forms.microsoft.com/ or use the App Launcher Grid at the top of Outlook or other Microsoft pages.
- Click on New Quiz (1) to start a quiz or New Form (2) for a blank form. Quizzes are good for assessments, as they have options for indicating correct answers (to be self-grading) and to assign points to individual questions. Forms are more appropriate for feedback, surveys, polls, and collecting input.


Optional: Select Explore Templates to find a Forms template.
- You can also create a new form from a .pdf or Word Document by selecting Quick Import (3). Note that the import should already be in the form of questions and answers, such as a copy of a multiple choice quiz.
- Add a title and description to your form.
-
-
Form Options for Quizzes
Open the Settings tab to customize options.
Option for Quiz: Use slider to turn on Practice mode. Students can practice at their own pace and see answers.
If there are questions that require manual input from the instructor, turn off Show results automatically. Students can also ask for a summary of answers at the end of the quiz.Who can fill out this form
Select one of the options. We recommend leaving Record name checked to ensure that students get credit for marked quizzes, unless you specifically ask students to enter their names as a quiz or form question. Uncheck this field if you are giving an anonymous quiz or form.Options for Responses:
- Accept Responses – Uncheck when you no longer want responses.
- Start / End date – set dates for the quiz (you’ll have the option to fill in dates)
- Set time duration – set for timed quizzes. Not available for a practice quiz.
- Shuffle questions – each student will get a different order for the quiz. Helps to prevent copying answers.
- Disable question number – quiz will not show numbers. Helps to prevent copying answers.
- Show a progress bar – good for students to track their progress, especially during a timed quiz.
- Hide Submit another response – will be checked off if students are only allowed one response.
- Customize thank you message – type in a message that will be shown once the quiz is completed.
- Allow respondents to save their responses – Note: you may not wish them to be able to save your questions if you reuse them.
- Allow respondents to edit their responses – default is to leave this unchecked.
- Response receipts – choose how to be notified when students submit a Form.
More Settings
Access a few more settings via the vertical ellipsis (More symbol) beside the Present icon.
Collaborate or Duplicate – invite a colleague to collaborate on the Form. Duplicate will make a copy that can be used as a template or to share with others without affecting your original version.Get Pre-Filled URL – The “Get pre-filled URL” feature in Microsoft Forms allows you to create a link to your form with some fields already filled in. This can be particularly useful for scenarios such as streamlining responses, personalization, or reducing errors. To use this feature:
- Open Your Form: Go to the form you want to create a pre-filled URL for.
- Select “Get pre-filled link”: This option is usually found in the “…” (More options) menu.
- Fill in the Fields: A new window will open where you can fill in the fields you want to pre-fill.
- Generate the Link: Once you’ve filled in the desired fields, click “Save” or “Generate link” to create the pre-filled URL.
- Share the Link: You can now share this URL with your respondents. When they click the link, the form will open with the specified fields already filled in.
Print Form – print the Form
Read Adjust your form or quiz settings in Microsoft Forms – Microsoft Support for more details on settings.
-
Add Questions or Elements to your Quiz or Form
Choose a type of question or option. You can choose from various question types like Choice, Text, Rating, Date, Ranking, Likert, File upload, or Net Promoter Score. You can also add a Section.
Question Types
The following choices are available for both Forms and Quizzes. Each question type or element can be customized by selecting the ellipsis (more menu) at the side of the question. Questions can also be labelled as Required.
Quizzes also have an option to indicate correct answers and to assign points to questions.
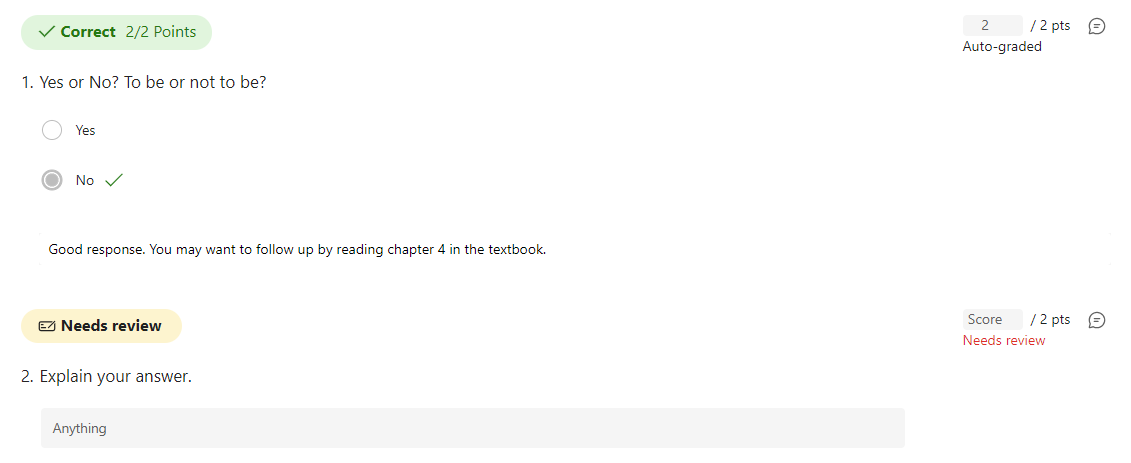
Providing Feedback: To provide additional information on a question, click on the More options (three dots) next to a question. Select Add feedback. This option allows you to provide specific feedback for each answer choice. Type your feedback for correct and incorrect answers. This feedback will be shown to students after they submit the quiz
Type Description Options Multiple Choice Respondents select one or more options from a list. Ideal for surveys and quizzes to gather specific preferences or test knowledge. Toggle Multiple Answers to allow respondents to choose multiple answers. Quizzes also have an option to use the Math Equation editor. Note: Microsoft Copilot will suggest AI answers based on your question. You may use the suggestions in whole, part, or delete and add your own.
Add subtitle, shuffle options, drop-down list (for instructions), and branching. Text Open-ended questions that allow respondents to type their answers. Useful for collecting detailed feedback, comments, or personal information like names and email addresses
Toggle long answers for multiple lines of text. Quizzes also have an option to use the Math Equation editor.Add subtitle, branching, and restrictions (e.g., number, text length). Rating Questions that let respondents rate items on a scale, such as 1 to 5 stars. Can be used for gauging satisfaction levels or evaluating performance. Add subtitle, branching, label (symbol and the number of levels. Date Questions that prompt respondents to select a date from a calendar. Good for scheduling events, booking appointments, or tracking deadlines. Add subtitle, branching. Ranking Questions that ask respondents to rank items in order of preference or importance. Useful for prioritizing features, services, or tasks. Shuffle lines. Branching. Likert Questions that present a statement and ask respondents to rate their level of agreement on a scale (e.g., Strongly Agree to Strongly Disagree). Ideal for measuring attitudes, opinions, or satisfaction across multiple items. Labels can be edited, or columns deleted. Add subtitle. Branching. Upload File Allows respondents to upload files as part of their response. Useful for collecting documents, images, or other files needed for applications, assignments, or feedback. Can limit number of files attached, or file size. Add subtitle, specify file types, and branching. Net Promoter Score Asks respondents how likely they are to recommend a product or service on a scale from 0 to 10. Commonly used to measure satisfaction. Add subtitle, branching. While adding questions or elements you can format your text. Highlight a word or words in your title or questions, and then choose any of the following:
- Bold (keyboard shortcut – CTRL/Cmd+B)
- Italic (keyboard shortcut – CTRL/Cmd+I)
- Underline (keyboard shortcut – CTRL/Cmd+U)
- Font color and size
- Numbering or Bullets.
Important: If you delete a question after the quiz has been released, it will be permanently deleted along with any response data that’s been collected for it. Learn more.
-
Add Sections to your Form
Sections in Microsoft Forms are used to organize a quiz or a form into multiple parts, making it easier for respondents to navigate and complete. Here’s how they work and their benefits:
- Organization: Sections help break down a long form into manageable parts, making it less overwhelming for respondents. Each section can have its own title and description to provide context. Sections are particularly useful for lengthy surveys, detailed questionnaires, or any form that benefits from being divided into smaller, focused parts.
- Branching Logic: Sections can be used with branching logic to direct respondents to different parts of the form based on their answers. This ensures that respondents only see questions relevant to them. Branching options are available for all question types.
- Reordering and Duplication: You can easily rearrange sections or duplicate them if you need to reuse a set of questions.
To add a section in Microsoft Forms:
- Select Section for the options for a Form or Quiz.
- Add a title and description for the section, then add your questions.
- You can also add sections after the questions are created and move them into a section.
- Use the ellipsis (more menu) to select options, including duplicating the section, removing the section with or without questions, move the section, or add additional branching.
-
Add Style and Media to your Form
Microsoft Forms offers a wide variety of templates and layouts to customize and enhance your Form or Quiz.
- Explore Templates: On the main page, you’ll see an option to explore templates. Click on Explore Templates to view a variety of pre-designed templates for different purposes, such as surveys, quizzes, and feedback forms. Browse through the available templates and layouts and select options that fit your needs. You can preview the template to see its structure and questions.Once you select a template, you can start customizing it. Change the title, description, and questions to suit your specific requirements. You can also add new questions or remove existing ones.
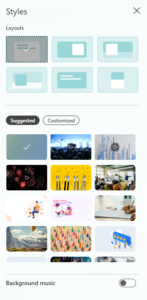
- Change the Layout and Styles: Once you begin editing your Form, you can change the layout, background images, and colours by clicking on the Style tab at the top of the screen.
- Toggle between Suggested and Customized to see options.
- Add media to individual questions or sections: Each element of Forms has an option to insert media. Select the image icon (1) beside a question and (2) choose to upload an image or a video from your computer or OneDrive/SharePoint.
-
Release results automatically / hold results until manually graded
You can control when quiz answers are revealed to students in Microsoft Forms by adjusting the quiz settings. Choose whether to provide instant feedback or hold the results until you’ve had a chance to review them.
- Access Settings: Click on the More form settings (three dots) in the upper right corner. Select Settings from the dropdown menu.
- Adjust Answer Display Settings: In the Settings pane, look for the option Show results automatically. If you want students to see their results immediately after submitting the quiz, ensure this option is checked. If you prefer to review and manually grade responses before students see their results, uncheck this option.
Five Essential Tips on Auto-grading for Microsoft Forms Quizzes | Microsoft Community Hub offers some good tips on setting up your quizzes for automatic grading.
-
Preview your Form
- Select the
- To test out your form, answer the questions in Preview mode, and then select Submit.
- To keep editing your form, select Back.
Share your Form
- Select the Collect responses tab to share your form via a link, email, or embed it.
- Choose the recipient(s) of the Form (1). Options include anyone, only those with a U of T account, or specific individuals or groups.
- Check off Record Name (2) (otherwise Form may be anonymous). Best practice: always turn this on unless you want the response to be anonymous.
- Allow one or multiple responses (3).
- Copy a link to the Form (4). You can choose to shorten the link, then copy it.
- Choose the sharing method (4): invite (using the form below), use a QR code, or copy the embed link to add to a website or Quercus. In the form below, choose to send the Form via Outlook email or by Teams.
- Select the
-
Collect and Analyze Responses
View real-time responses and use built-in analytics to evaluate the data. You can choose to show them their scores immediately after submission or after you have reviewed all responses. Export responses to Excel for further analysis. You can see individual student responses and the overall performance, including the error rate for each question.
- Select the View Responses Tab.
- Choose the action you would like to take:
- Open Result in Excel – view answers on a spreadsheet. This allows you to sort, filter, and create charts to better understand the class’s performance
- Review Answers – If you’ve adjusted settings to hold results in order for questions to be manually graded, you can check answers and also provide feedback to students within the quiz results. Students will only see their own feedback. Feedback can be added on individual answers by selecting the Feedback icon beside the points for that question.
- Post Scores – release scores to students. When you post scores, students receive a notification to view their results. They can access their scores and feedback by following the quiz link provided.
For more information on reviewing scores and sharing results consult Check and share your quiz results – Microsoft Support.
- Select the View Responses Tab.
-
Present quizzes live during class
Teachers have the flexibility to share a live quiz directly from the Forms web for a quick knowledge check. They can see students’ answers in real-time, and subsequently tailor their teaching.
- Select the Present icon at the top of the screen.
- Share the link in your Quercus course or display the QR code so that students can access the slides.
- Follow prompts for display options. This will vary by type of question.
Learn more about presenting forms/quizzes here: (1)
- Select the Present icon at the top of the screen.


 Option for Quiz
 Accept Responses – Uncheck when you no longer want responses.
 Collaborate or Duplicate – invite a colleague to collaborate on the Form. Duplicate will make a copy that can be used as a template or to share with others without affecting your original version.


Guides
-
U of T Information Commons Help Desk Knowledge Base – Microsoft Forms Frequently Asked Questions (FAQ).
(UTORid login required to view)- What is Microsoft Forms?
- What is the difference between a “Personal Form” and a “Group Form”?
- If someone deletes a Group Form, what recovery options exist?
- Where are files submitted through the “File Upload” question stored?
- Can a form with a “File Upload” question be shared externally?
- Can forms be assigned to SharePoint or Teams groups?
- How can I push Microsoft Forms responses into a SharePoint list?
- Will group members be notified when a form is created or when responses arrive?
- Can IT or Microsoft 365 admins access someone’s personal form or its data?
- Can Microsoft Forms work as a live polling tool (instead of Mentimeter)?
- When to choose Microsoft Forms
- When to consider Mentimeter (or similar)
-
Microsoft Guides
Videos
Additional Information From Local Academic Units
Considerations
Privacy Considerations:
- Forms defaults to collecting email addresses. To accept responses anonymously, go to Settings and turn off the automatic collection of emails.
Last Modified:
17 February, 2026
This work is licensed under a Creative Commons BY-NC-SA 4.0 International License