Team Up!
Team Up! is a web-based group assessment tool made to encourage group/team work, peer teaching, engagement with course materials, and active learning.
The assessment tool is designed to make students work together to reach a consensus before choosing their answer, providing immediate feedback on the answer given.
Multiple choice is currently the only supported question type, with the option of plain text, LaTeX, pictures/graphs/images or YouTube videos embedded within the question. Students can access the tool using any device (phone, tablet, computer) via their course in Quercus. Marks are sent directly to the Quercus Gradebook. Points (in the form of diamonds) are awarded based on how many attempts are required to obtain the correct answer, and can be customized to personal preference; typically, 5 points are awarded if a group is correct on the first try, 3 points if two tries are required, etc.
If you are having issues adding a Google Drive link to a GDrive Module (link not being retained) remove the “https:// ” portion of the URL before adding it to the GDrive Module box. More information can be found in the Troubleshooting & FAQ section.
To solve authorization errors during launch of Team Up!, when creating your Team Up! assignment on Quercus, select the “Load This Tool In a New Tab” button in the Submission Type box on Quercus (this is in the same box/area where you select Team Up! as your external tool when creating the assignment). More information can be found in the Troubleshooting & FAQ section.
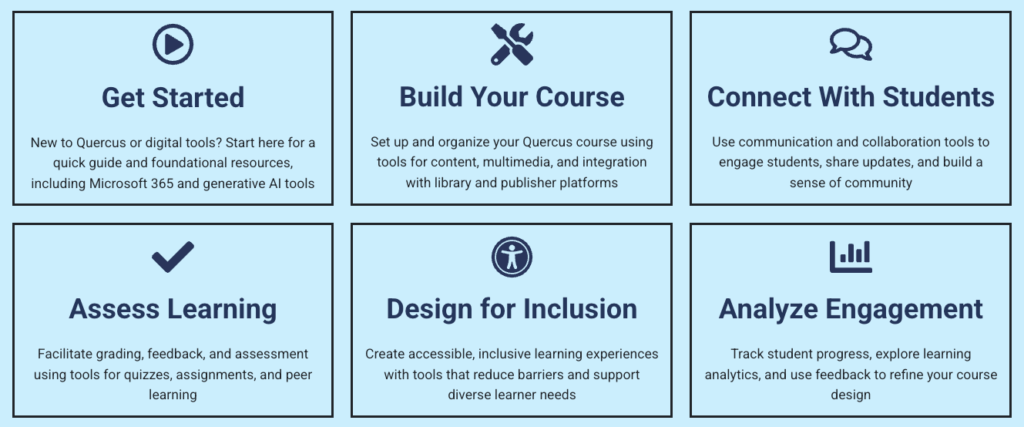
The Academic Toolbox helps you...
Typical Course Format?
Most tools in the Academic Toolbox can assist in both online and face-to-face courses. Many tools can provide benefits in either synchronous or asynchronous teaching. Some tools have been primarily designed for one format or another (synchronous/asynchronous), however, may be adapted for any format depending on your pedagogical goals.
To learn more about different teaching modalities, please consult our Online Teaching & Learning page, arrange a consultation with a CTSI Teaching Liason, or contact your Divisional support representative.
Where can I get more support?
How to Get Started
Team Up! is a web-based group assessment tool made to encourage collaborative group/team work where students work together to reach a consensus before choosing their answer.
Instructions
-
Creating an Instance in Quercus:
Creating an instance allows you access into Team Up!’s Instructor Panel, where you can build and link quizzes, monitor student activity in real-time, and download quiz reports. It also creates a page for students to access your quiz/assignment.
1. Open “Assignments” or “Quiz” tab on the sidebar.
2. Create an Assignment or Quiz and title it.
3. Under “Submission Type”, select “External Tool” from the drop-down menu.
4. Under “External Tool Option”, click on “Find” to launch a list of external tools.
5. Scroll through to find Team Up! and click on it.
6. press the “Select” button to link Team Up!.
7. Under Assign, make sure to set which student groups you want to be able to access the Team UP! Instance, and when.
8. Save the assignment or quiz. Don’t forget to publish before you expect your students to access it!
Accessing your Team Up! Instructor’s Panel:
In Team Up!’s instructor’s panel, you can create and publish Team Up! quizzes, view live statistics and download activity reports.
1. Press “Go to Tool” in the assignment you have created to access your Team Up! Instance.
-
Building a Team Up! Quiz or Problem Set:
Note: Questions should be added in desired order as they cannot easily be reordered.
1. Open the Team Up! Instructor’s Panel
2. Open “Build Quiz” panel and click “Create Quiz” button (The new quiz will appear under “Ungrouped”).
3. Title quiz and assign it to a group if desired.
-
- The “Group” field allows you to input a folder name, and acts as a way of grouping your quizzes within Team Up!. For example, you might create a Group called Course 123 simply by typing the desired group name into the box. All quizzes/assignments that you create for Course 123 will be located under this new Group (folder).
4. To share the quiz with other instructors or your TAs, input their UTORIDs separated by commas.
-
- If you do not share your quiz, TAs or fellow instructors in your course will still be able to view all the instructor dashboard components but can’t access your individual quiz or problem set questions. Sharing a quiz here allows others to edit your quiz.
5. Click “Add New Question” button.
6. Select the newly created question.
7. Title your question
8. Click the “Settings” button to open the “Question Settings” menu,
9. Set the following for this specific question:
-
- Question type:at the moment, multiple choice is the only functional option.
- Option order randomization: randomize the answer options of your question.
- Feedback collection: this allows students to write a comment about a particular question, and the comment will appear in the instructor reports
- Grading scheme: leaving an attempt value blank removes it from the menu.
10. Click the “Settings” button again to close the menu.
11. Input and edit answer options in the “Create New Question Option” box.
12. Set the correct answer by selecting the radio button of that question option.
13. The content of the question itself is included by adding a content module, which is described in detail below.
14. The quiz is saved automatically. To delete the quiz, click “Delete Quiz” from the Question Settings menu.
-
-
Adding text, images, and videos to a Team Up! Question:
Content can be added to questions through the “Add Content Module” drop-down menu.
Note: Modules should be added in desired order as they cannot be easily reordered. To remove a content module, delete the text in the “EnterContent” box completely.
1. Select from the “Add Content Module” drop-down menu.
-
- Adding Text:Select “Text Module” and input content into the “EnterContent” box. Formatting is supported for LaTeX and HTML (bold, italics, underline, superscript, subscript, font size, font color, font family, text alignment).
-
- Adding Images:Select “G Drive Module”. Insert a shareable Google Drive link of the image into the “EnterContent/” box.
- Adding YouTube Videos:Select “Youtube Module”. Insert a Youtube video into the “EnterContent/“ box in the following format: “www.youtube.com/VIDEOID”.
- Adding MyMedia Content: Select “MyMedia Module”. Paste the link to your MyMedia content into the “EnterContent/” box with the format: src=“https://play.library.utoronto.ca/embed/VIDEOID” (including the quotations). *** Note: some students may not be able to see videos that have restricted access without logging in with their UTORID and password. See FAQ for more details
-
-
Copying Questions from other Team Up! Quizzes:
Questions from an existing quiz can be copied to a new quiz.
1. Choose a question in the “—select a question to copy—“ drop-down menu.
2. Click “Copy Question” button to add it.
-
Linking a Team Up! Quiz or Problem Set to Quercus:
Once a quiz has been built, it must be linked with the Team Up! assignment to be published.
1. Open the “Publish Quiz” panel.
2. Select the quiz you want to link with this Team Up! Quercus assignment.
3. Set whether you want to use dynamic grouping and navigation lock.
-
- Disable Dynamic Grouping to have students participate in the quiz in pre-set Quercus groups.
- Pre-set Team Up! student groups may be made in Quercus but need to have the prefix tup or teamup (case insensitive). All other student groups that you may use through Quercus will not be recognized.
- Enable Dynamic Grouping if you want students to form their own groups.
- This is the easiest option. Note:Students cannot switch group memberships.
- Enable Navigation Lock to have students complete the quiz/assignment in the order you have set, without being able to jump between questions.
- Disable Dynamic Grouping to have students participate in the quiz in pre-set Quercus groups.
4. Click “Link Quiz”.
5. Under “Linked Modules” you can confirm that the correct quiz has been linked with the Quercus assignment
6. To unlink a quiz, either link a new quiz by repeating steps 2-4, or delete it in “Linked Modules”.
-
- Note:Deleting a linked module and re linking a quiz will reset previous quiz activities and reports.
7. In Quercus, publish the assignment to post the Team Up! Quiz publicly.
-
-
Grading on Quercus:
1. In the Team Up! Assignment or Quiz settings on Quercus, input the total points of the Team Up! Quiz under “Points”.
2. Choose “Points” for the type of Grade Display using the drop-down menu.
3. If required, set start and end dates/times for your assignment or quiz. You can use this function of Team Up! to limit student access to desired times or to provide different access times for different students or groups of students.
4. Save the assignment or quiz.
5. Team Up! quiz scores for each student in a group will be automatically recorded under Quercus Grades once the student group leader or driver finishes the Team Up! quiz and submits the score for the group to Quercus.
-
Monitoring Team Up! in Real-Time:
Team Up! Quiz sessions can be monitored in real time on the Team Up! Instructor’s Panel, which displays the current question number, groups viewing the quiz, and the number of groups that have completed it.
1. Open “Dashboard” panel in the Team Up! Instructor’s Panel.
2. Under Live Statistics, you can view the number of students currently taking the quiz and respond to Driver change requests from students.
3. Under Quiz Activity, you can view quiz statistics in real-time. Question Title cells act as progress bars for the entire class, filling up blue as students complete the quiz questions. Additional information on the average number of attempts and the frequency with which the distractors are chosen is also displayed in real-time.
4. Under Groups, you can view group details and members by searching a groupID or picking an ID from the Group Browser.
5. Under Group Browser, all groupIDs are listed. GroupID buttons also act as progress bars for that individual group.
-
Downloading Team Up! Quiz Reports:
1. Open the “Reports” panel.
2. Select a quiz from the drop-down menu to view its report. Reports for older quizzes remain available.
3. Click on “Participant List”, “Attempts Summary”, “Attempts Breakdown”, or “Feedback Results” to see a table of the report.
4. Click “Download” button to download the report in a .csv file.
- The “Participant List” gives a breakdown of each student by their USER ID
- “User ID” is the UTORID of the student.
- “Quiz Score” is the final score given to that student
- “Submit Status” is the status of the quiz. “Submitted” means that the student has completed and submitted their quiz. “In Progress” means that the student has not yet hit the final “Submit to Quercus” button.
- “Group ID” is the identification number for the group the student was in. A value of “ind” means the student was working alone.
- “Group Leader” identifies is the student was the leader of their group
- “Last Updated” is the last time this row was updated for this student.
- “Quiz Started” shows the exact time the student entered the quiz.
- The “Attempts Summary” gives statistics for each question of the quiz.
- “Avg Attempts” shows the average number of attempts it took to compete the question.
- “Attempts Distribution” shows the number a breakdown of the attempts by number of groups.
- “Options Distribution” shows a breakdown of the selected answers by number of groups.
- The “Attempts Breakdown” gives a breakdown for each of the attempts at a question for each group.
- The “Feedback Results” shows the feedback given for each question if enabled in the question settings.
- The “Participant List” gives a breakdown of each student by their USER ID
Guides
-
Troubleshooting & FAQ:
Please contact melody.neumann@utoronto.ca for troubleshooting and other queries.
Frequently Asked Questions:
- Solving broken Team Up assignment links:
-
Edit the assignment, under the “External Tool Options” click “Find” and click on TeamUp! (even if you did this before, do it again).
Save the changes.
-
- Solving Authorization Error message:
-
Recently, Firefox and Edge users may experience an Authorization error (as shown below) when clicking the “Go To” button to launch the Team Up! application. To solve this, when creating your Team Up! assignment on Quercus, select the “Load This Tool In a New Tab” button in the Submission Type box on Quercus (this is in the same place where you select Team Up! as your external tool).
“Authorization Error. Please use the Go To Tool button in Quercus to enter Team Up.”.
-
Creating Team Up! assignments:
- Are there any other types of question types I can use other than multiple choice?
- At the moment, multiple choice is the only question format available. There are placeholders for other question types that are currently unavailable, and we are working to implement them as soon as possible.
- As a workaround, you can include a text box for free-form type questions, Team Up! by enabling “Collect Feedback” in the question settings. While Team Up! can not directly assign marks for these questions, these answers are available in the instructor reports under the “Feedback Results”.
- Click here for for how to add a Feedback comment box. Click here for how to retrieve feedback comments.
- How many students can be together in a Team Up! group (either fixed or dynamic)?
- A maximum of 10 students can be in a single Team Up! group.
- Can I re-use the Quercus assignments that I created in my course last year?
- New assignments must be created each year in Quercus when using TeamUp! to ensure complete functionality.
- When I make course copies of my Quercus course, should I copy my External Tools?
- When importing content from a previous Quercus course into a new Quercus course, do not import External Tools. If you do, you will get multiple listings of each External Tool
- I want to assign only a participation grade for TeamUp! and make the whole assignment worth 1 mark. Can I do that?
- TeamUp! was designed for each individual question in a quiz/assignment to be worth at least 1 mark (or diamond). You can make your TeamUp! assignment worth a whole number worth of marks, then convert them to a participation mark in the Quercus gradebook after students have completed the assignment.
- Can I use LaTeX commands in the answer choices?
- Yes! You now can use LaTeX commands in answer choices.
Viewing / Using Team Up! as an Instructor:
- Will a quiz have to be restarted if wifi/network connection to Team Up! is interrupted?
- No, quiz progress will be saved and students will be able to return to the last question they were working on.
- How do students send in their completed quiz results?
- Students must click the button to submit grades to Quercus at the end of the Team Up! quiz.
- Can a Team Up! student group change their Driver if needed?
- Students can request for a driver change by pressing the red exclamation mark button in the top right of their Team Up! Quiz.
- Why are my students being asked to log in when accessing MyMedia files?
- MyMedia files that have restricted access can only be access by individuals with a valid UTORID and password. In most cases, the browser will log in automatically. If this is not the case, the student can manually log in with their UTORID and password.
- This potential problem can be avoided completely by unrestricting access to your MyMedia file. To do this, find the file you want to remove access restrictions for, click the pencil under that file, click the “Access” tab, and change the sharing options from “University of Toronto” to “No Restrictions”. Please note that this will allow anyone access to the file, regardless of whether they have a valid UTORID, so do not do this unless you are prepared to share this file with the world.
- Link added to GDrvie Module not being retained, only showing E/terContent/
- When creating a share link from GDrive you may get a link with a resourcekey, or a standard link
- If you see a resourcekey in your share link, you can enter the link into the Module as-is e.g. : https://drive.google.com/file/d/0B6KQs_4hF5LuV0VadDVzX29UWVk/view?usp=sharing&resourcekey=0-t-1AbOob8Erm8ufWz_ay0w
- If you do not see a resourcekey, you will need to remove the “https://” portion of the URL before adding it to the GDrive Module e.g. : drive.google.com/file/d/0B6KQs_4hF5LuV0VadDVzX29UWVk/view?usp=sharing
- Is quiz activity on the dashboard displayed in real time?
- The number of active users is displayed in real time, but quiz activity needs to be refreshed manually using the green Refresh button.
- Solving broken Team Up assignment links:
-
Team Up!
Team Up! is a web-based group assessment tool created to encourage group/team work, peer teaching, engagement with course materials, and active learning. The assessment tool is designed to make students work together to reach a consensus before choosing their answer, providing immediate feedback on the answer given.
Students access the tool using any device (phone, tablet, computer) via their course in Quercus. Marks are sent directly to the Quercus Gradebook. Points (in the form of diamonds) are awarded based on how many attempts are required to obtain the correct answer; typically 5 points are awarded if a group is correct on the first try, 3 points if two tries are required, etc. Your instructor may use a different point scoring system.
How to Access a Team Up! Session on Quercus:
In Team Up!, students can create and join groups to work on quiz questions as a team. Your instructor may have also pre-assigned you to Team Up! groups. The instructions below provide a general outline, but your instructor for your course may have more specific instructions.
- Decide which student in your group will be the Leader (Driver) for the session.
- Log-in to Quercus from your device (phone, tablet, computer).
- Click on the Team Up! Quiz you have been assigned (usually found in the Assignments, Quizzes or Modules tab of your course).
- Click Go to Tool to access Team Up!.
- If your instructor has pre-assigned groups, all you need to do is vote for the Leader (Driver) by clicking on that person’s name at the top of your team’s Team Up! Session.
How to Participate in Team Up!
If your instructor has asked you to form groups spontaneously (i.e. you are not in a pre-assigned group), your team’s Leader (Driver) must create a group and obtain your team’s unique Group ID for this session. The Leader then shares the unique Group ID with the other team members, allowing them to join the newly established group. The unique Group ID is found at the top of the created Team Up! Session , with the person who created the Group automatically assigned as the Leader or Driver.
Your Role as the Driver:
- The Driver acts as team leader, responsible for navigating the quiz , confirming the team’s final agreed upon answer to a question, and submitting the completed quiz score to Quercus. The driver can also enter feedback if requested by the instructor.
- The Driver has a steering wheel next to their ID and is differently coloured than other Team Members.
Your Role as a Team Member:
- Team Members participate and choose their answers, so all team mates can see what they have chosen, but they cannot submit their choices to Team Up!.
- The Driver chooses a question, and the team can participate by choosing their own answers and discussing their choices with each other. Once the team decides on a final answer, the driver chooses it and clicks the Check Answer button.
- Note: The Driver can check an answer despite what the team members choose, so be careful that you have consensus before clicking the Check Answer button. You cannot undo.
- Note: The Driver can check an answer despite what the team members choose, so be careful that you have consensus before clicking the Check Answer button. You cannot undo.
- If the answer is correct, you will be awarded the full score or “diamonds” for that question. You will be able to proceed onwards by clicking the Next button that will appear under the Check Answer button or by clicking on a question in the menu on the left. If your team’s answer is not correct, discuss the question and choose again. Repeat until you get the correct answer. All teammates can see whether responses are correct/incorrect as well as their team’s overall score as they progress through the Team Up! session.
- After completing the quiz, click the Review & Submit tab. The Driver MUST click Submit to Quercus to send your group’s Team Up! quiz scores to Quercus for grading. If this is not done, no one on the team will see a grade in the Grades section of your Quercus course.
- Once the score has been submitted by the Driver, you can exit the Team Up! Session by closing your browser tab. It’s a good idea to check that your score shows in the Grades section of your course. If not, please remind your Driver to Submit to Quercus.
Team Up! Troubleshooting & FAQ:
- My screen seems to be lagging compared to those of my group members (eg. I’m not on the same question as the driver/members, the answer I chose does not appear on my group members’ screens, etc.)
- As long as you are logged in, you will receive your grade, so just continue to participate by communicating with your team. Almost always, your device will re-sync with the rest of your team’s devices within a minute or two. If not, refresh your screen once. Repeatedly refreshing is not usually helpful!
- I’ve been disconnected. Will my quiz progress be saved? Can I re-join my group?
- Enter the Team Up! session again and you will automatically be put back into your group. Your progress will be saved, and you will return to the question you or your group was working on. This is true for the Driver as well as any team member.
- How do I send my completed quiz results?
- Click the large red “Submit to Quercus” button at the end of the Team Up! quiz.
- Can I chat with other group members through Team UP!?
- Unfortunately, there is no built-in chat box for group discussion in Team Up!. You may discuss your answers with your groupmates using breakout groups in Bb Collaborate, or face-to-face in class.
- Can we change our group driver?
- You can request a driver change by pressing the red exclamation mark in the top right of your Team Up! quiz.
- How is the driver for our group chosen, and how can the driver pass the group ID to others in remote classes?
- Group members can decide who will be the Driver (ideally someone with a good internet connection). The Driver can pass the group ID to other members verbally through chat or microphone in Bb Collaborate breakout rooms.
- The Driver of my group has to leave unexpectedly or their device has stopped functioning. How do we proceed with the quiz?
-
- Request for a Driver Change using the red button at the top right of your Team Up! Session. This button only provides help for Driver Changes. You may also need to speak with your instructor or TA.
- Request for a Driver Change using the red button at the top right of your Team Up! Session. This button only provides help for Driver Changes. You may also need to speak with your instructor or TA.
Videos
Last Modified:
25 May, 2026
This work is licensed under a Creative Commons BY-NC-SA 4.0 International License