Microsoft Teams Meeting Video Recording
Microsoft Teams is a chat-based collaborative work space that brings together people, content, and conversations. MS Teams Meetings can be used to hold classes or record webinars for both synchronous and asynchronous online learning and virtual meetings.
Recordings made with MS Teams Meeting is stored in OneDrive or SharePoint, depending on where the recording originated, and can be shared with colleagues and classes.
Notes about Recordings
Hosting: Recordings are saved in your Microsoft 365 OneDrive or SharePoint.
Captioning: Live captioning is available during a meeting; however, it is not retained afterward. If you enable Transcription together with recording, you will be able to toggle on captions while viewing in OneDrive or Sharepoint.
These captions are not editable. If you need to correct them you will need to download the recording to your computer, then upload to MS Stream. You may also wish to consult Captioning Videos for more information.
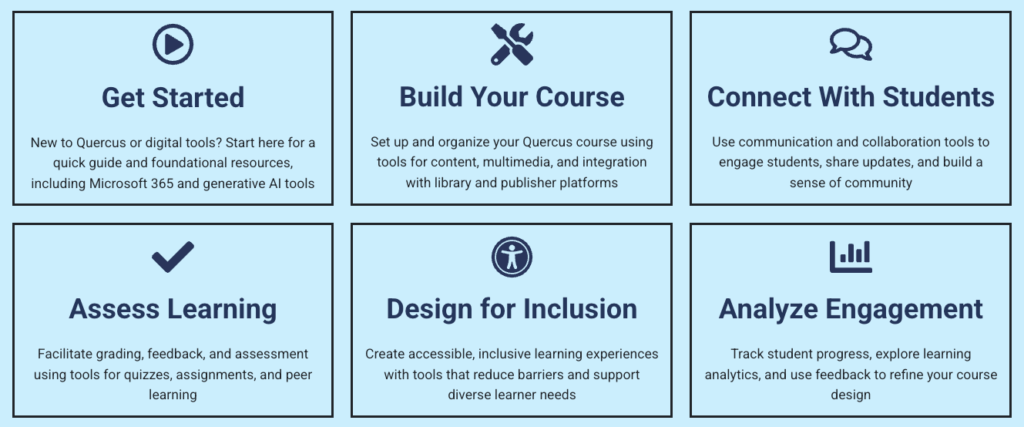
The Academic Toolbox helps you...
Typical Course Format?
Most tools in the Academic Toolbox can assist in both online and face-to-face courses. Many tools can provide benefits in either synchronous or asynchronous teaching. Some tools have been primarily designed for one format or another (synchronous/asynchronous), however, may be adapted for any format depending on your pedagogical goals.
To learn more about different teaching modalities, please consult our Online Teaching & Learning page, arrange a consultation with a CTSI Teaching Liason, or contact your Divisional support representative.
Where can I get more support?
Related resources / similar tools
How to Get Started
Microsoft Teams is a chat-based collaborative work space that brings together people, content, and conversations.
How to Use This Tool
MS Teams Meetings can be used to hold classes or record webinars for both synchronous and asynchronous online learning and virtual meetings. Any recordings made with MS Teams Meetings is stored in OneDrive or SharePoint, depending on where the recording originated, and can be shared with colleagues and classes.
Accessing Teams Meetings
Teams Meetings can be accessed online or by downloading the MS Teams App. To access Teams:
- Log in to your Outlook/Microsoft 365 account
- Click on the waffle in the top left-hand corner
- Select the Teams tool.
- To download Teams, log in to the online version and click on the computer icon in the bottom left-hand corner.
Set Up a Teams Video Meeting or Class
To learn about starting MS Teams Meetings, please see Microsoft Team Meetings
Instructions
-
Record a Session
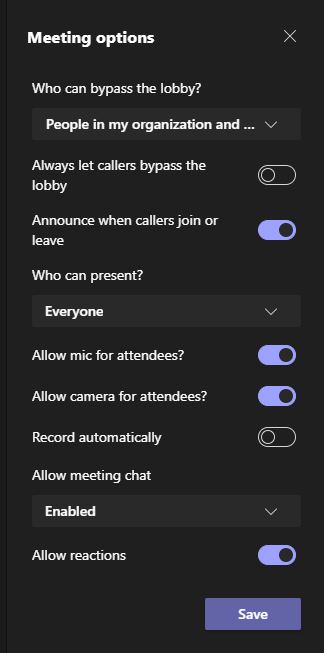
NOTE: The recording will be saved to the OneDrive of the person who started the recording. To ensure that faculty or TAs receive the recording, restrict the ability to record to the meeting organizer or selected individuals. This can be enabled when setting up a meeting under Meeting Options. Once in a meeting, organizers can select the 3-dot menu > Meeting Options. Change Who can present? from Everyone to Only me or Specific people. Consult Roles in a Teams meeting
 for more details.
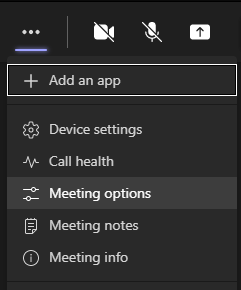
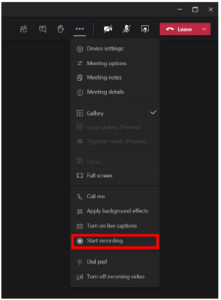
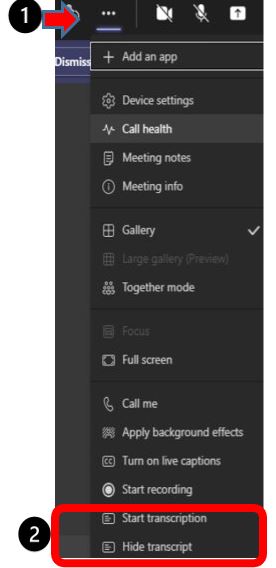
- After joining the session, select More options … (the 3 dots) in the top menu.
- Select Start Recording in the drop-down menu.
- Everyone will be notified with an on-screen message that the recording has started.
- A red dot on the screen indicates that recording is on.
- When finish recording, open the menu again and select Stop Recording.
- After joining the session, select More options … (the 3 dots) in the top menu.
-
Recording Notes
- Only the Meeting Organizer or someone from within University of Toronto can start a recording. External guests and those attending anonymously will not be able to record or stop recording.
- Recording will continue even if the person who started it leaves the meeting.
- The recording will stop automatically when everyone leaves the meeting.
- If someone forgets to leave the meeting, the recording will stop after 4 hours.
-
Transcription
- The Meeting organizer can open the Meeting Controls bar by selecting the 3-dot menu.
- Select Start transcription during your live meeting to start the transcription which will be saved with the recording. Transcriptions will appear in a separate pane beside the main screen for everyone logging in with a UTORid.
- Everyone will be notified that a transcript is available.
- The transcript’s text includes the speaker’s name and a timestamp.
- Participants can turn off name display by selecting their Teams user icon > Manage account > Captions and transcripts. Opt out of speaker attribution by toggling off Automatically identify me in meeting captions and transcripts. Speaker 1, 2, etc. will now be displayed.
-
What is captured in Teams Meetings Video Recordings?
- Recordings: Currently MS Teams Meetings records audio, video, and screen sharing activity. Whiteboards and shared notes are not currently captured in meeting recordings although they can be accessed in the chat. (per Microsoft Teams documentation).
- Live Captions are individually enabled by participants during a session but are not retained with the recording.
- Transcripts are only saved with the recording if the meeting host selected “Start Transcription” during the live meeting.
- If Transcripts are generated with a recording, viewers can select CC to toggle on or off Closed Captions during recording playback.
- Transcripts can be downloaded as a text file or .vtt (captions) file. The transcript file only contains information beginning when the “Start Transcription” option was turned on, not when the meeting started. They are not editable. Refer to Captioning Videos for more information.
- Captions can be generated once recordings are saved to OneDrive/Sharepoint. See Microsoft 365 – OneDrive for more information.
- Recordings: Currently MS Teams Meetings records audio, video, and screen sharing activity. Whiteboards and shared notes are not currently captured in meeting recordings although they can be accessed in the chat. (per Microsoft Teams documentation).
-
Breakout Rooms
Breakout Rooms can be recorded; however, the recording must be started by a participant active in the breakout session and ended while the Breakout Room is in progress in order for it to appear on the chat for the room.
-
View and Download Recordings
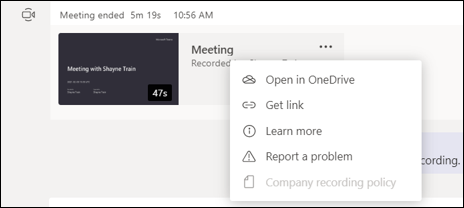
- Once the recording finishes processing, an image will appear in the meeting chat. If a Transcript was generated, it will appear underneath the video.
- Select More actions … beside the recording.
- Choose Open in OneDrive if it was a chat meeting or Open in SharePoint if it was a channel meeting.
Recordings will be saved based on who starts the recording and the type of meeting. Check the Permissions or Role-Based Access chart
for information on locations and access. Individuals can access recordings by going directly to the appropriate storage location in OneDrive or SharePoint.Type of Meeting Where Recording is Saved Example Non-Channel meetings One Drive of the person starting the meeting recording (not the Organizer). Recorder’s OneDrive for Business /Recordings Channel meetings Team’s SharePoint site documentation library in a folder named Recordings, in the Files tab for the channel (in SharePoint) Teams name – Channel name /Documents /Recordings in the Files tab -
Breakout Room recordings
Breakout Room recordings are kept in the OneDrive of the person who initiated the recording, in OneDrive>Recordings. The meeting organizer has access to the recording through the Chat. Recordings must be ended while the Breakout Room is in progress in order for it to appear on the Chat for the room.
-
Who has Permission to View and Share the Meeting Recording?
- For non-Channel meetings, all meeting invitees, except for external users, will automatically get a personally shared link. External users will need to be explicitly added to the shared list by the meeting organizer or the person who started the meeting recording.
- For now, guests and external attendees can only view the recording if it’s explicitly shared with them. Only the meeting organizer or person who recorded the meeting can share recordings. Other people can share, but will need to be approved.
- While you can control whom you share with, you won’t be able to block people with shared access from downloading the recording.
- For Channel meetings, permissions are inherited from the owners and members list in the channel.
- Only the organizer of the meeting and the person who started the recording will be able to edit the recording. Everyone else invited to the meeting will be able to view it.
-
Playing a Recording
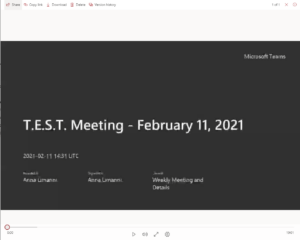
Your video will play in the video player of OneDrive or SharePoint.
Options are currently limited to sharing, downloading, deleting or viewing the history. Clicking the “i” in the top right will display current access and activity.
At the bottom, you can play the recording, toggle the audio, expand the screen or adjust some settings by selecting the cog to change the quality of the recording.
If a Transcript was generated, the viewer can select CC to view captions. If a transcript was not generated, the CC button will not appear.
-
Hosting and Sharing Downloaded Recordings
Team Recordings can be shared from OneDrive, SharePoint, saved to one of University of Toronto’s hosting sites or downloaded to your computer.
A disadvantage of leaving the recording on OneDrive is that the transcript, if Transcription is enabled, is not editable.
The University of Toronto supports two media hosting sites: MyMedia and MS Stream. Please refer to these pages for information on hosting and sharing videos.

Guides
-
Documentation from U of T
- Teams Page from EASI
- Connect+Learn Recordings (EASI) about Teams
- Microsoft Teams Audio Conferencing (EASI) – using dial-in audio
- Teams Support in KB – FAQs when using Teams
- Teams Page from EASI
-
Documentation from Microsoft
-
Documentation from Canvas
Last Modified:
4 December, 2025
This work is licensed under a Creative Commons BY-NC-SA 4.0 International License