JupyterHub

The University’s JupyterHub is an open-source, web-based platform that offers an interactive standardized Python and R computing environment without burdening users with installation and maintenance tasks. Instructors and students can work in their own workspaces on shared resources managed efficiently by system administrators. JupyterHub provides a centralized environment for running Python, R, and other kernels.
JupyterHub offers persistent storage, and it can be used for educational settings, teaching, individual prototyping, collaborative work, dataset distribution using GitHub repos, and data exploration.
In January 2023, Academic, Research and Collaborative technologies (ARC) launched datatools.utoronto.ca, an improved and simplified landing page for U of T’s educational JupyterHub. From this page, you can access all of U of T’s JupyterHub services in one central place.
Learn more about the changes made to U of T’s JupyterHub.
For technical support, please submit a ticket to JupyterHub service desk via the Enterprise Service Centre.
The Academic Toolbox helps you...
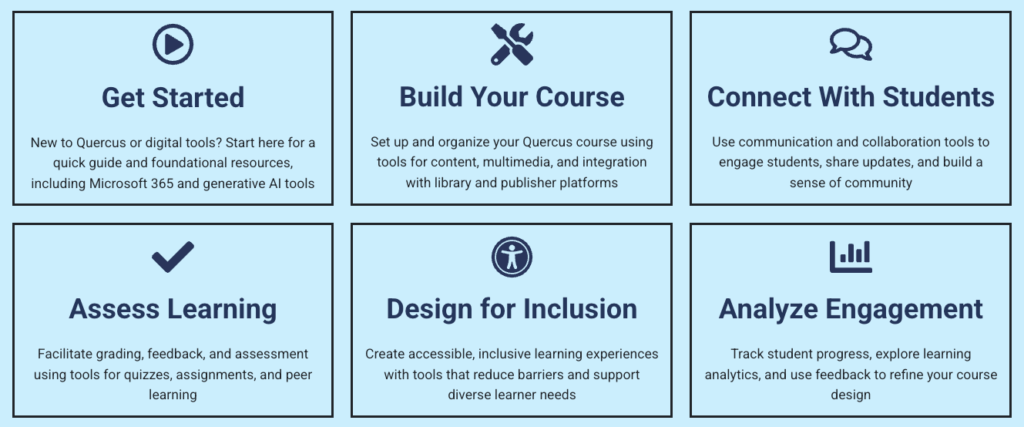
Typical Course Format?
Most tools in the Academic Toolbox can assist in both online and face-to-face courses. Many tools can provide benefits in either synchronous or asynchronous teaching. Some tools have been primarily designed for one format or another (synchronous/asynchronous), however, may be adapted for any format depending on your pedagogical goals.
To learn more about different teaching modalities, please consult our Online Teaching & Learning page, arrange a consultation with a CTSI Teaching Liason, or contact your Divisional support representative.
Where can I get more support?
How to Get Started
You can access U of T’s Educational JupyterHub by navigating to https://datatools.utoronto.ca/ and selecting one of the listed services: Jupyter Notebook, RStudio, or JupyterLab.
How to Use This Tool
U of T’s Educational JupyterHub offers the following services:
Jupyter Notebook:
Jupyter Notebook, generically referred to as a “computational notebook”, often referred to as “Classic Notebook,” is a simplified Python notebook authoring application that allows for creating and sharing documents that contain live executable Python code, MathJax equations, visualizations, and narrative text. Notebooks help you explain your code and allow its execution alongside markdown annotation, and can produce rich, interactive output, including HTML, images, videos, and LaTeX.The applications of Jupyter Notebook include data preprocessing and transformation, numerical simulations, statistical modelling, data visualization, machine learning and other computational disciplines. It provides a straightforward and minimalist environment which can be used for completing assignments or focusing on a single script or notebook at a time.
Note:As of January 2024, Jupyter Notebook maintains a Python environment only. R users should select RStudio.
RStudio:
RStudio is an open-source IDE tool that harmonizes various elements of R such as coding, graphical output and data management into a cohesive and efficient workspace. It is tailored to simplify the initial learning process for those new to R, while also providing sophisticated functionalities for seasoned users, and offers the convenience of accessing R environments remotely.
JupyterLab:
JupyterLab is a highly extensible, feature-rich Python notebook authoring application which provides a workspace for individual exploration. It offers an expanded suite of tools that cater to the diverse needs of research, pedagogy and learning, and can be used across various disciplines, including data analysis, visualization and broader scientific inquiry. JupyterLab builds on the classic notebook user experience by introducing a sophisticated, browser-based interface that seamlessly integrates multiple notebooks. Advanced features include an integrated markdown editor, a robust file management system and a versatile file viewer.
Instructions
-
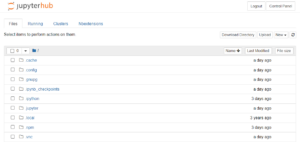
Once you login, a new instance/server will be allocated to you, where you can store your data files and code files. The file structure is similar to what you see on your own system (laptop/pc).
-
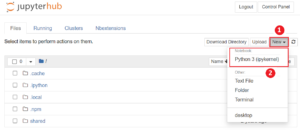
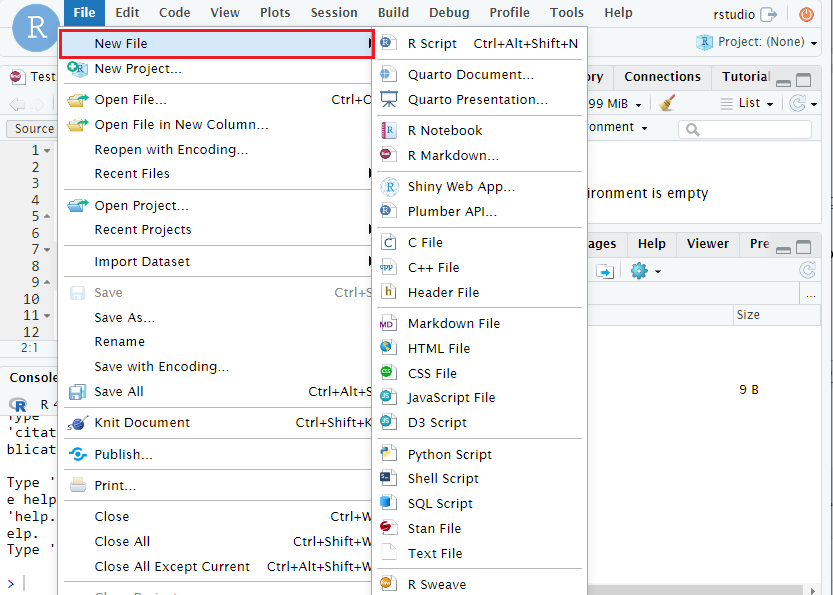
To create a new Notebook for Python:
- Navigate to ‘Files’ tab.
- Click ‘New▼’ drop-down button.
- Select ‘Python 3 (ipykernel).

- A new Python (iPython notebook) file will be created in the current directory and opened in a new tab.
- Click on the ‘Untitled’ in the title bar to rename the file.
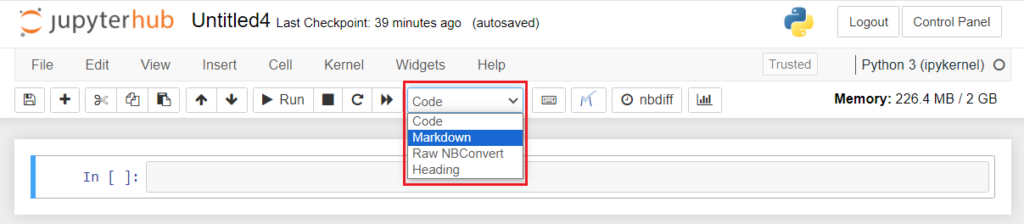
The body of the page contains a rectangular bar-like structure called Cell. This is where the code/markdown text is written. The toolbar has various buttons to add a new cell, copy a cell, run a cell, change the type of the cell (Code, Markdown, Raw NBConvert and Heading), and so on.
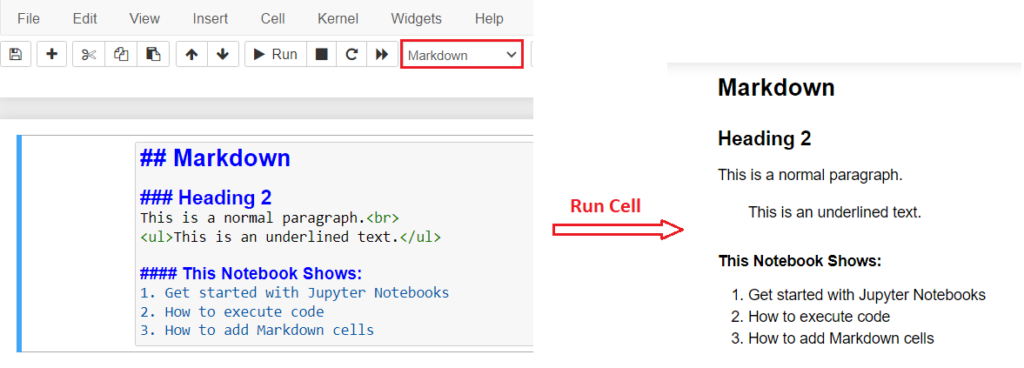
Markdown Cell
The markdown cell is generally used for providing explanations or descriptions of code within Jupyter notebooks. It enables users to incorporate various formatting elements such as headings, titles, bullet points, and numbering, enhancing the readability and organization of their content. The cell mode can be changed to Markdown type by selecting Markdown from the dropdown button in the tool bar.
An example of a Markdown cell is illustrated below, showcasing how the output is rendered when the cell is executed.
To learn more about Markdown refer to The Ultimate Markdown Guide (for Jupyter Notebook).
-
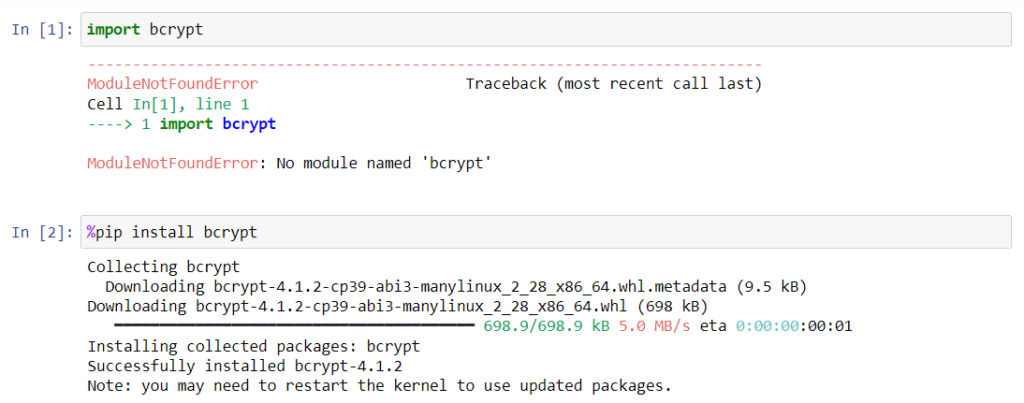
The U of T’s Educational JupyterHub is setup with Anaconda Python distribution and comes with common packages preinstalled. The packages can be imported into the current notebook as usual by typing “import “.
You can install your own packages or packages that do not exist in the U of T JupyterHub directly from the code cell by using the Jupyter line magic command, %.
To install a new package, run “%pip install <package name>” in a new cell. By doing this, you do not need to open the terminal to install new packages. This is done from within the notebook itself.
The manually installed packages do not persist in the system after logging out. This means that if you had installed a package from within the notebook, the next time you log in and try to run the code, you will have to re-install the package. To avoid this, it is better to implement the try and except method offered by Python, as shown below:
-
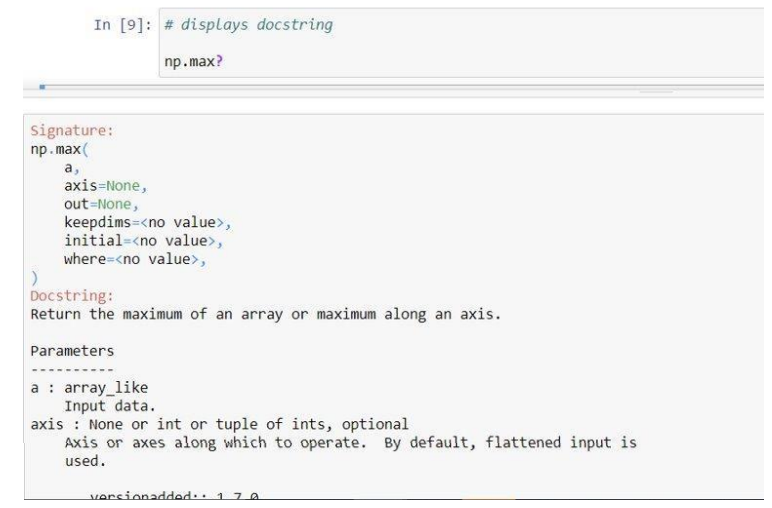
Another advantage of a Jupyter notebook is that you can easily read the descriptions of packages or Python objects such as class, methods, and functions, if the description is provided in the code by developer. Just type ‘?’ after the function/package name and run the code cell.
-
The ‘%’ sign used while installing new packages and ‘?’ used to view the documentation of certain packages or functions are examples of magic commands.
These commands can be used in Jupyter notebooks for enhancing the functionality and understanding of the code. Magics are specific to and provided by the IPython kernel.
While there are numerous magic functions available with the Python kernel, two prominent examples are showcased below. To learn more about other available commands, please refer to the Built-in magic commands documentation.
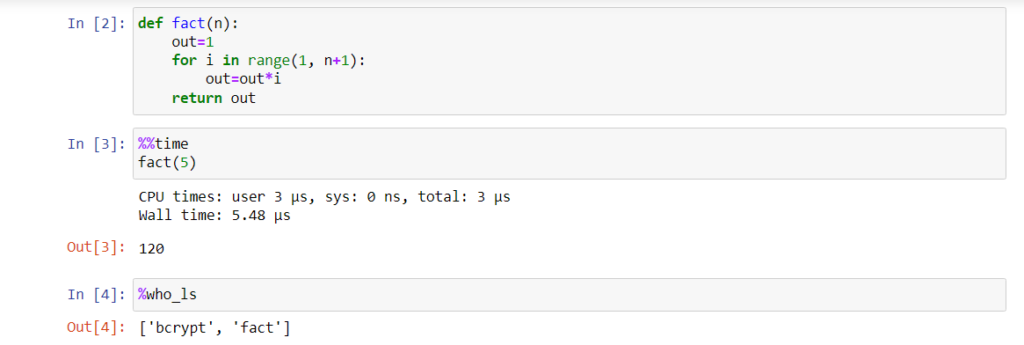
Examples of such magic commands
- %%time or %time: These commands are used to measure the time taken by a function or a line of code to execute. To use this command in line mode prefix with single % sign. To use it in cell mode, prefix with %%.
- %who_ls: This command shows the sorted list of all the interactive variables/aliases used in the notebook.
-
There are various ways to distribute files for use in JupyterHub:
-
One-click download (nbgitpuller):
This method requires files to be uploaded in a public GitHub repository. A sharable link can be created using nbgitpuller. When clicked on this link, users will be taken directly to the UofT JupyterHub and files will be fetched automatically into user file explorer inside JupyterHub. This can be used as a one-to-many file distribution mechanism.
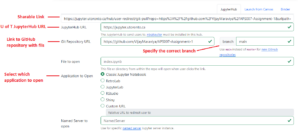
- Create public repository on GitHub and upload files to the repository.
- Navigate to https://jupyterhub.github.io/nbgitpuller/link and fill out all the required details.
Nbgitpuller will always respect and retain user modified files when a git repo is retrieved more than once. Learn more about Automatic Merging Behavior and how various possible cases are handled where the student (end user) and instructor (author of the repo) modify the repository.
-
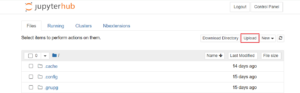
Upload/download files manually
Instructors can use this method to post all the files required for the assignment on Quercus from where the students can download and upload manually to their JupyterHub directory. Clicking on the upload button will open the file picker to select and upload files from student’s computer to JupyterHub.
-
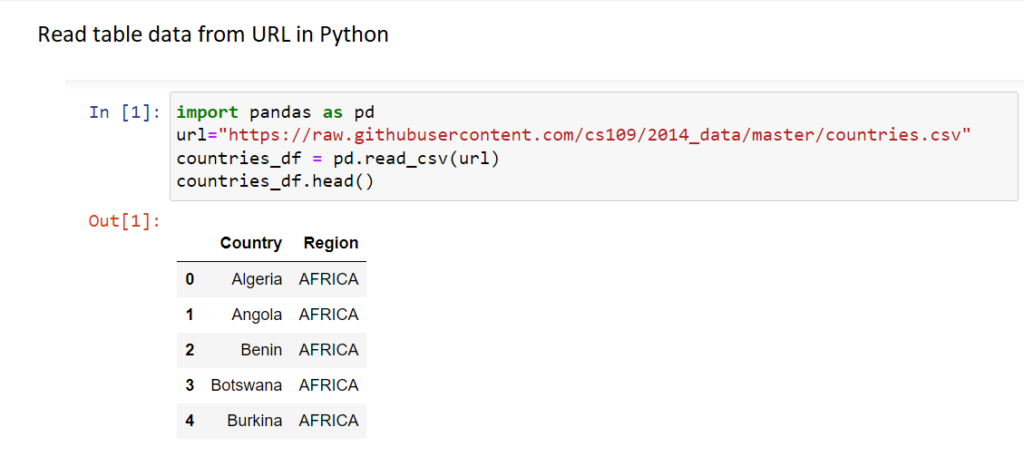
Read files from URL using supported Python modules
Example for one such module, Pandas, is shown below which reads a csv file into a Pandas DataFrame object.
-
-
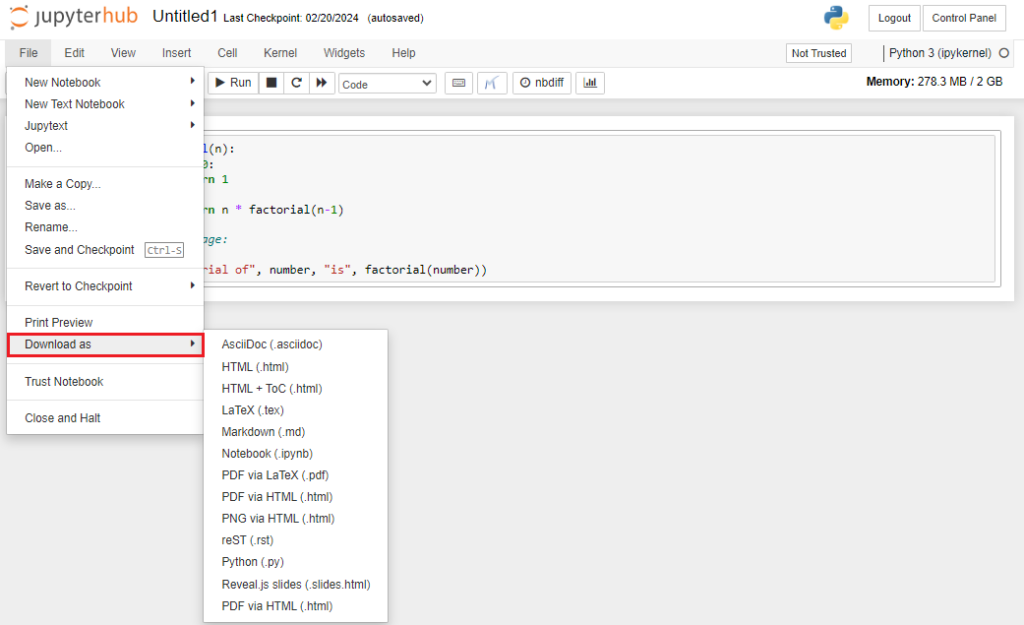
- Open a notebook you want to export.
- Click on the ‘File’ menu button.
- Click on ‘Download as’ to see file options.
- Select the appropriate file extension.
- A download of exported file will begin shortly.
- The file will be saved at a location specified or the default download location.
-
- Navigate to the ‘File’ tab on the top-left.
- Select the ‘New file’ button.
- Select the type of file such as (R Script, R Markdown).
- A new (untitled) file will be created in the current directory and opened in a new tab.
- Select the save current document button to save and change your file name.
-
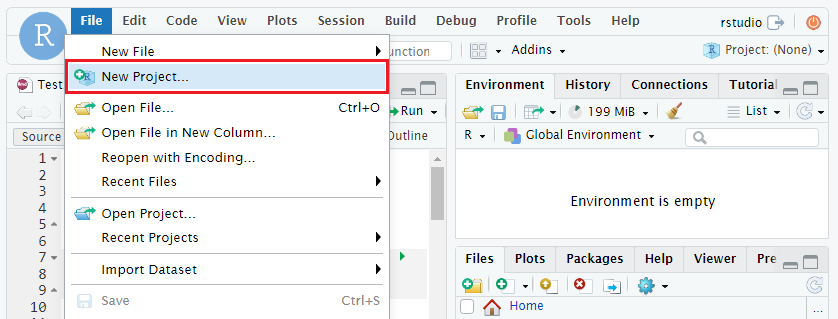
- Navigate to the ‘File’ tab on the top-left.
- Click the ‘New Project’ button.
- Choose to create a project in existing directory or new directory.
- Choose the folder you want to store the project.
- A new project will be created in the current directory.
-
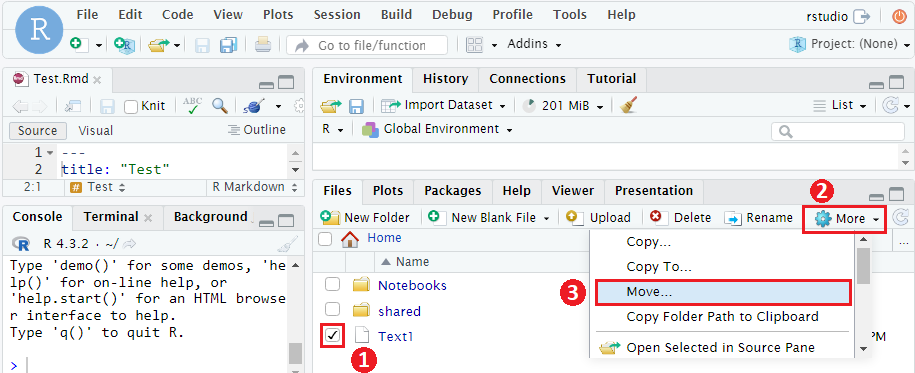
- Navigate to the “Files” tab in the bottom-right panel.
- Select a file by clicking the checkbox on the left.
- Click the “More” button.
- Select “Move”.
- Select the destination folder.
- Click “Yes” to finish move or “No” to cancel this action.
-
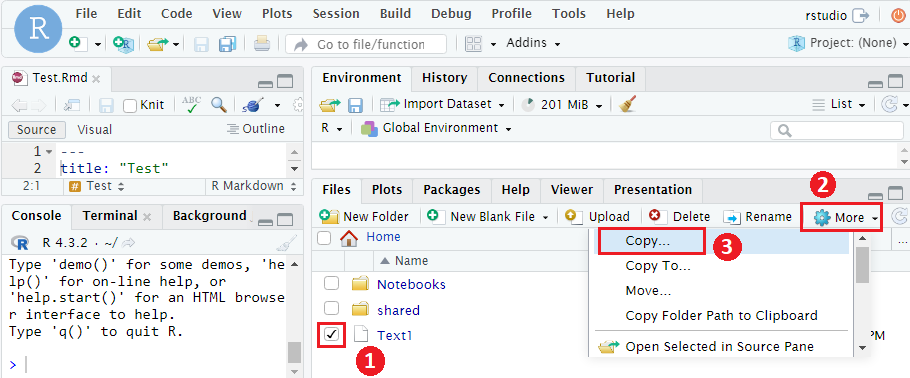
- Navigate to the “Files” tab in the bottom-right panel.
- Select a file by clicking the checkbox on the left.
- Click the “More” button.
- Select “Copy”.
- By default, the copied file is named as “Copyof{filename}”, you can change the file name.
- Click “OK” to finish move or “Cancel” to cancel this action.
-
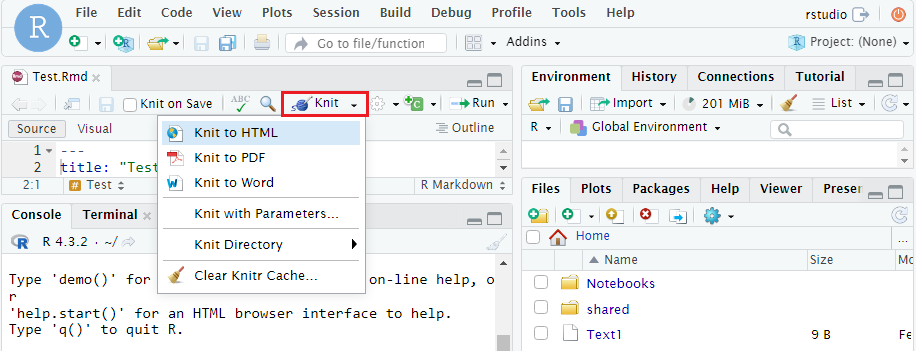
- Click the ‘Knit’ button on the top.
- Select the file type (Knit to HTML, Knit to PDF, Knit to Word).
- Wait until a new window shows you the exported file.
- Click the download button on the top-left to download the exported file.
-
- Navigate to the ‘Files’ tab on the bottom-right.
- Click “Upload” button on the bottom-right panel.
- Click the “Choose File” button.
- Select the file you want to upload from your computer.
- Click “OK” to finish or “No” to cancel this action.
-
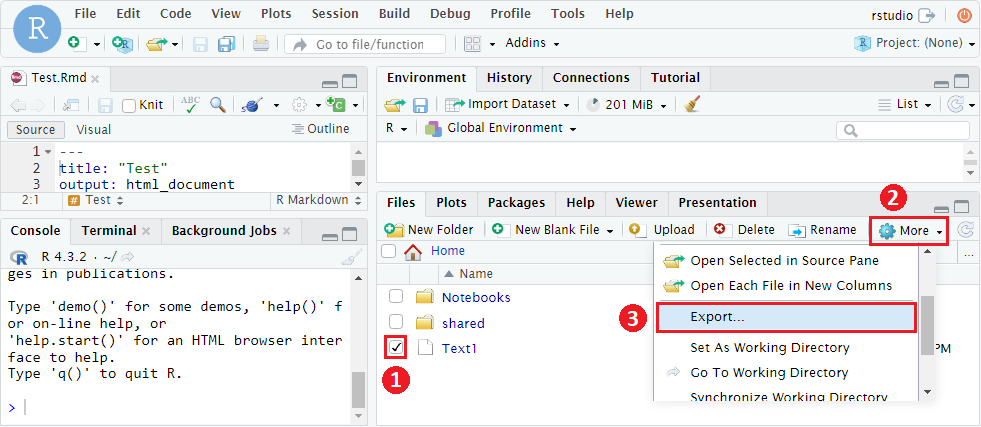
- Navigate to the ‘Files’ tab on the bottom-right.
- Select a file by clicking the checkbox on the left.
- Click the “More” button.
- Select “Export”.
- Click “Download” to download the file to your computer.
-
Given the JupyterHub limited resources, it is important to be mindful of certain factors to ensure optimal performance and efficiency, and prioritize tasks and workflows that are well-suited to the available system resources, optimizing productivity while minimizing the risk of performance issues.
A default instance of JupyterHub is allocated 2GB of RAM and shared access to several CPU cores.
Things to avoid when working within these constraints:
- Needlessly Complicated Dataset Manipulations: While JupyterHub provides a versatile platform for data manipulation and analysis, it is essential to avoid overly complex operations that may strain the system resources. Attempting to perform intricate dataset manipulations or computations can lead to slow performance and potential system instability.
- Working with Very Large Datasets: It is advisable to avoid working with very large datasets that exceed the system’s capacity. Processing large datasets can quickly consume available memory and processing power, resulting in performance degradation and potential system crashes. If you are considering an exercise or assignment to be distributed to students – ensure your data set size is well matched to the exercise and not needlessly large.
- Installing using ‘conda install’: pip install has considerably lower memory usage, so if you experience issues installing packages using ‘conda’, try ‘pip’ instead.


Guides
-
Jupyter Notebooks:
The Jupyter Notebook and JupyterLab official documentation will help you go beyond getting started and understand how to best use computational notebooks.
A sample Jupyter notebook: Jupyter Notebook Viewer | Exploratory data analysis in Python
Python:
Python Documentation: The official Python language reference.
Python For Everybody by Charles Severance: A getting started lesson set for those with minimal programming experience (used in University of Michigan courses on Coursera and edX).
R and RStudio:
RStudio IDE User Guide: The official manual for RStudio.
The R Manuals: The official documentation of the R language.
Introduction to R markdown: R allows more markdown options than Jupyter Notebooks; This resource will allow you to learn about R markdown.
R Cheatsheets: Essential, compact PDFs for Base R, Tidyverse, Shiny and others.
Learn the tidyverse: A set of packages for data exploration, analysis and visualization.
-
University of Toronto Libraries Map and Data Library: Our library offers a range of workshops catering to both Python and R users. Self-paced online courses and tutorials are available for both R and the tidyverse.
U of T coders: A collaborative, cross-disciplinary group for skill sharing, collaboration and community. Includes students, staff and instructors and holds workshops and training sessions.
-
For technical support please contact the JupyterHub service desk by submitting a ticket through the Enterprise Service Centre.
Last Modified:
4 December, 2025
This work is licensed under a Creative Commons BY-NC-SA 4.0 International License